So we're going to discuss display boards in this post. Once upon a time these were largely rare, but over the last 5 or 6 years have become a mainstay piece of hobby here in the US at least. When going to a large scale tournament like Adepticon you expect to see some pretty amazing boards and sometimes you do. There are still guys toting their armies around in empty cardboard soda pop trays; without question there probably always will be as long as there are new people getting into the hobby. However it is more common now that when attending tournaments to see fancy display boards. They can range from extremely simple to overly extravagant. Adepticon really shows off both. I've seen massive 40K Team Tournament Displays that costs hundreds to thousands of dollars. Mine have never been so extravagant but they are designed to generally be effective and cost efficient.
I've just recently in the last couple of days re-built a new Display for my Dwarf army. My old one while I liked it for the theme was old and beat up and probably wasn't doing me any favors in the paint scoring department. Generally at tournaments your display board will get you a few points in your painting category for having put in the effort to help your army look all the better. I do not think that a display board will ever be the difference between losing or winning a tournament but I could be wrong.
So fro this let's go over materials. Most hobbyists will have the necessary things to start with such as exacto blades, paints and brushes so lets discuss the things you'll need that you may not have.
Housing Insulation Foam:
You can buy this stuff in sheets of 8'x4' from pretty much any building store. Lowes, Home Depot, Menards, Ace Hardware, etc... They all carry some kind of it. You can find it in smaller sheets and varying thicknesses. The kind I used is pictured. Blue 2" foam in an 8'x4' sheet. It costs about $25 when I purchased it. Keep in mind that was a couple years ago for building terrain so the price may be a bit different now.
Hot Wire Foam Cutter:
Also available in many, MANY shapes, sizes and configurations. This is not the one I used. The one that I used has a single copper rod extending from a handle with a plug so that I'm not restricted to the size of foam I can cut. The on pictured for example would only be able to cut a specific range of thicknesses based on what you could fit into that fork. These range in prices as well, but my particular one cost about $25 from Jeffery Allens Crafts.
Metal Poster Frame:
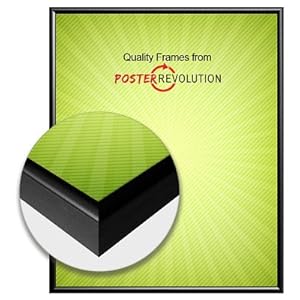
This may seem unneccessary at first. I mean why does a board need a frame right? Well, you'll figure it out after you don't use it and you kick the board while its under the table your playing at a couple times. Or run it into door frames, corners of walls, etc... This stuff is just there to save the edges of your board. Although it does also add a bit to the aesthetic look of the board and show you went that extra step. You can buy these things in sectionals from places like Hobby Lobby where the cost tends to be about $10 for 2 sections. You can buy them anywhere from 6" up to like 40" so you can really customize the size frame/board you want to build based on the sections you purchase.
Spray Paints:
Many spray paints contain caustic chemicals that generally melt styrofoam of any kind when sprayed on them. There are some however that you can get from hobby shops which are safe. Valspar in the middle is actually a regular spray paint that if you spray it in thin coats will not eat your foam. The two cans on the sides are Krylon Stone textured spray paint. This stuff is designed to not eat foam and the reason I chose these is that it eliminates the need to flock the board after painting as this stuff is essentially flock and paint in a can. It does spray on heavy texture and thin paint though which is why I bought the Valspar paint to use as a base coat before hitting the board with the stone.
Stage 1: Frame and Base
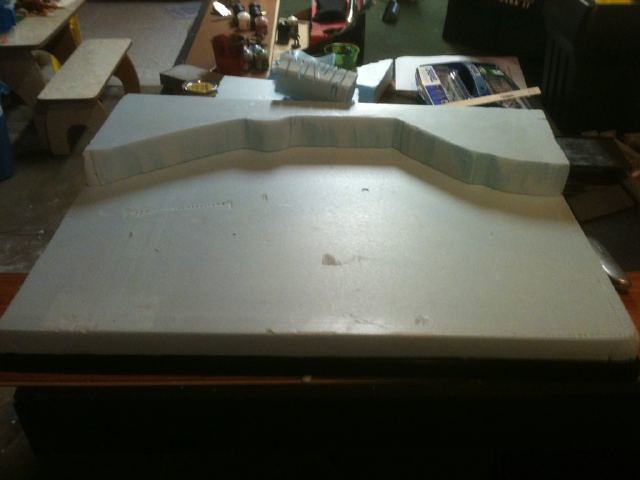
Its a little hard to see in the picture but I started with a 27"x20" poster frame. I usually try and put a piece of MDF board under the foam in the frame but I ran out on my last project and didn't feel like buying more so I took an extra step in the construction of this board. I used the foam cutter to cut grooves into the sides of the 2" foam about 1/2" up from the bottom and fit the frame directly into/onto the foam. This provides less center support for the foam but I don't believe it will break from weight. I could later of course be proven wrong. I then took another pieces of foam 10" wide and 27" long and rough cut a big chunk out with a carpenters blade. I then used my foam cutter to shape it better for what will be cliff faces.
Stage 2: Additional Layers
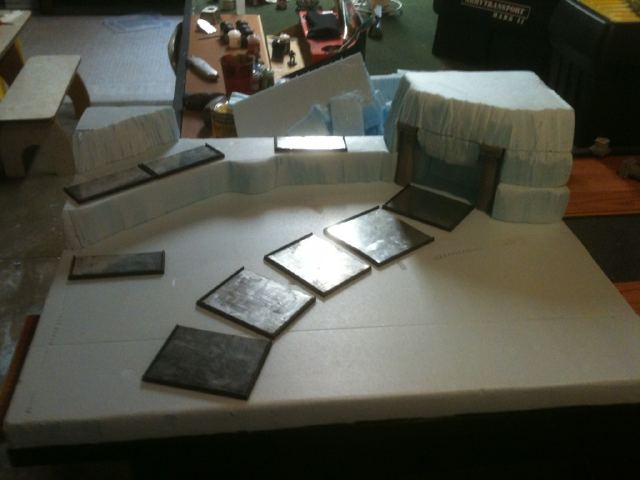
Irresponsibaly I smashed forward without taking enough in between pictures. This however has had 2 extra layers and some other things added to it. The 2nd layer was additional cliff height on the left and right. This is also the point at which I took the 1st layer and in conjunction with the 2nd layer cut open the large cave entrance. I carved larger holes for some cake pillars I had on my previous display board so I could re-use them. They aren't anything exceptional looking; but I feel they add just that little bit to it. Then there is a 3rd layer on top of that. I also sat my movement trays onto the board to figure out how I would generally arrange the army and make sure that it would all fit well.
Step 3: Flock It
Again with irresponsible picture taking. In retrospect I wish I would've taken multiple pictures of the paint process. I know it was only spray paints but hey, it came out really well I thought. First I cut out a angled piece in the front center for a nameplate which adds that little extra bit and I think is especially important in helping to get those players choice points having your name right up front. Then of course I had to masking tape the frame and I masking taped some thick paper around the hills so as not to get the green spray flock on the mountain. Sprayed the sections separately and then sprayed the road when it was all done. Of course I then had to immediately get my army out of its case and set it up to see the finished product. Well close to finished... I still have some final touches to do such as the nameplate and some small embelishments I plan on putting in, but otherwise its essentially complete.
List:
Foam - $25-30 for a massive sheet (use on other projects later)
Hot Wire Cutter - $25+
Poster Frame - $20 and that's really as big as you want a display base to be
Spray Paints - $10 for each of the Stone Paints, $5 for the Valspar
Total: $80 and up depending on what you get
This appears extremely high, however when you consider that you'll probably use the rest of that foam and paint for hills, towers, other scenery pieces you'll get your moneys worth of all of these things.
A display board doesn't really take that long, and I built this one over the course of 2 days. If you've spent as much time on your army as I have and if your a better painter than me likely more time then it behooves you to go this little bit further in the creative process. Hopefully you've gotten some ideas and useful bits from this. Thanks for reading!


