
So we're going to discuss display boards in this post. Once upon a time these were largely rare, but over the last 5 or 6 years have become a mainstay piece of hobby here in the US at least. When going to a large scale tournament like Adepticon you expect to see some pretty amazing boards and sometimes you do. There are still guys toting their armies around in empty cardboard soda pop trays; without question there probably always will be as long as there are new people getting into the hobby. However it is more common now that when attending tournaments to see fancy display boards. They can range from extremely simple to overly extravagant. Adepticon really shows off both. I've seen massive 40K Team Tournament Displays that costs hundreds to thousands of dollars. Mine have never been so extravagant but they are designed to generally be effective and cost efficient.
I've just recently in the last couple of days re-built a new Display for my Dwarf army. My old one while I liked it for the theme was old and beat up and probably wasn't doing me any favors in the paint scoring department. Generally at tournaments your display board will get you a few points in your painting category for having put in the effort to help your army look all the better. I do not think that a display board will ever be the difference between losing or winning a tournament but I could be wrong. So fro this let's go over materials. Most hobbyists will have the necessary things to start with such as exacto blades, paints and brushes so lets discuss the things you'll need that you may not have.
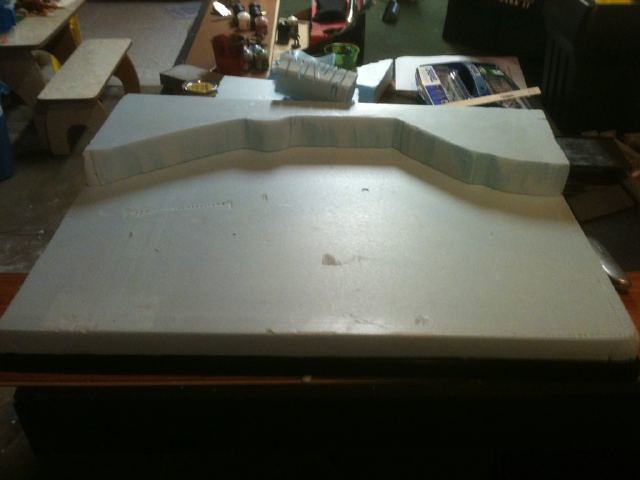
Housing Insulation Foam:

You can buy this stuff in sheets of 8'x4' from pretty much any building store. Lowes, Home Depot, Menards, Ace Hardware, etc... They all carry some kind of it. You can find it in smaller sheets and varying thicknesses. The kind I used is pictured. Blue 2" foam in an 8'x4' sheet. It costs about $25 when I purchased it. Keep in mind that was a couple years ago for building terrain so the price may be a bit different now.
Hot Wire Foam Cutter:

Metal Poster Frame:

Spray Paints:

Many spray paints contain caustic chemicals that generally melt styrofoam of any kind when sprayed on them. There are some however that you can get from hobby shops which are safe. Valspar in the middle is actually a regular spray paint that if you spray it in thin coats will not eat your foam. The two cans on the sides are Krylon Stone textured spray paint. This stuff is designed to not eat foam and the reason I chose these is that it eliminates the need to flock the board after painting as this stuff is essentially flock and paint in a can. It does spray on heavy texture and thin paint though which is why I bought the Valspar paint to use as a base coat before hitting the board with the stone.
Stage 1: Frame and Base
Stage 2: Additional Layers
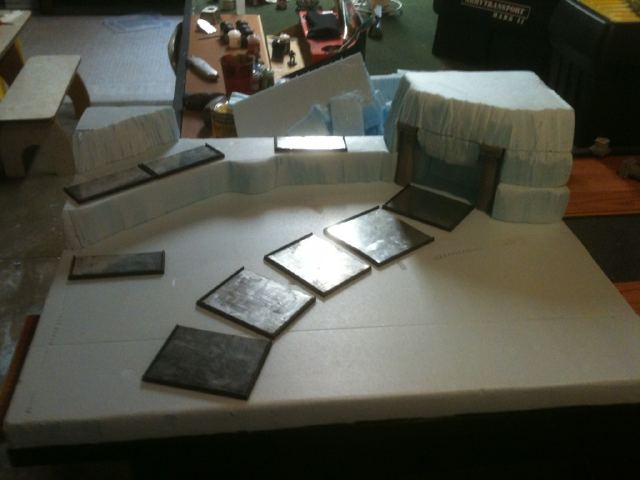
Step 3: Flock It

List:
Foam - $25-30 for a massive sheet (use on other projects later)
Hot Wire Cutter - $25+
Poster Frame - $20 and that's really as big as you want a display base to be
Spray Paints - $10 for each of the Stone Paints, $5 for the Valspar
Total: $80 and up depending on what you get
This appears extremely high, however when you consider that you'll probably use the rest of that foam and paint for hills, towers, other scenery pieces you'll get your moneys worth of all of these things.
A display board doesn't really take that long, and I built this one over the course of 2 days. If you've spent as much time on your army as I have and if your a better painter than me likely more time then it behooves you to go this little bit further in the creative process. Hopefully you've gotten some ideas and useful bits from this. Thanks for reading!
No comments:
Post a Comment